
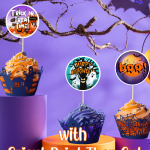
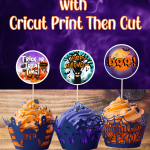
These Free Printable Halloween Stickers are the perfect decorations for your Halloween Party treats! Using your electronic cutting machine (Cricut, Silhouette, Brother…) or circle punch, you can create cute Halloween stickers, tags, and toppers to fit your spooky cupcakes, treat bags, and more!
These free digital products are provided in PNG format. I will be using my Cricut Joy Xtra and Cricut Design Space version 8.49.57 (Current Beta Version on 9/16/24.)
This post may contain affiliate links, which means I’ll receive a commission if you purchase through my links, at no extra cost to you. Please read the full disclosure for more information.
What You’ll Need
- A Cricut Cutting Machine that supports Print Then Cut (Explore and Maker families, Venture, Cricut Joy Extra). You can also use a Silhouette, circle punch, or scissors to cut the toppers.
- A color inkjet printer
- Blue LightGrip cutting mat
- Brayer
- Weeding tools
- Printable vinyl or sticker paper
- Plastic cupcake toppers

Practice Slicing in Cricut Design Space
This project is a fantastic way to practice using the Slice feature in Cricut Design Space. If you’re new to Cricut or want to get more comfortable with Cricut Design Space, making these cupcake toppers and tags is a great learning opportunity.
How to Make Your Free Printable Halloween Stickers
You will need an electronic cutting machine (such as a Cricut or Silhouette) or a circle punch to make these fun and free printable Halloween stickers. These instructions are written for Cricut Design Space using Print Then Cut. You can also use Silhouette Print and Cut or a circle punch instead of a cutting machine.
You can print as many or as few stickers and tags as you’d like and customize them to different sizes, as long as they follow Cricut Print Then Cut sizing requirements for Cricut Design Space or the Print and Cut sizing requirements for Silhouette Studio.
- Get your free copy of the Printable Halloween Stickers from the Makers Corner Crafts Shop.
- Download and unzip the file.
- Upload and import the PNG files into Cricut Design Space.
- Add the imported images to your canvas.
The PNG files have a transparent background and will work best in Cricut Design Space. Use the JPG and PDF file formats for printing and manual cutting.
Learn more on my post, How to Upload an SVGs to Cricut Design Space.
Resize the images for your craft project.
Use the slice functionality to cut a selection of contiguous or slice non-contiguous stickers.
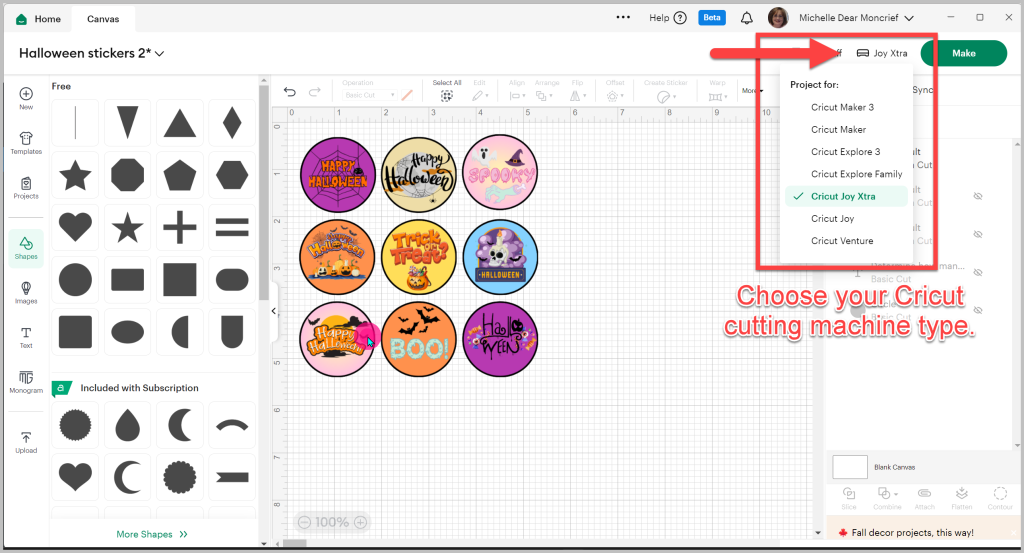
To make the stickers, select your Cricut cutting machine type on the upper-right-hand side of the screen.
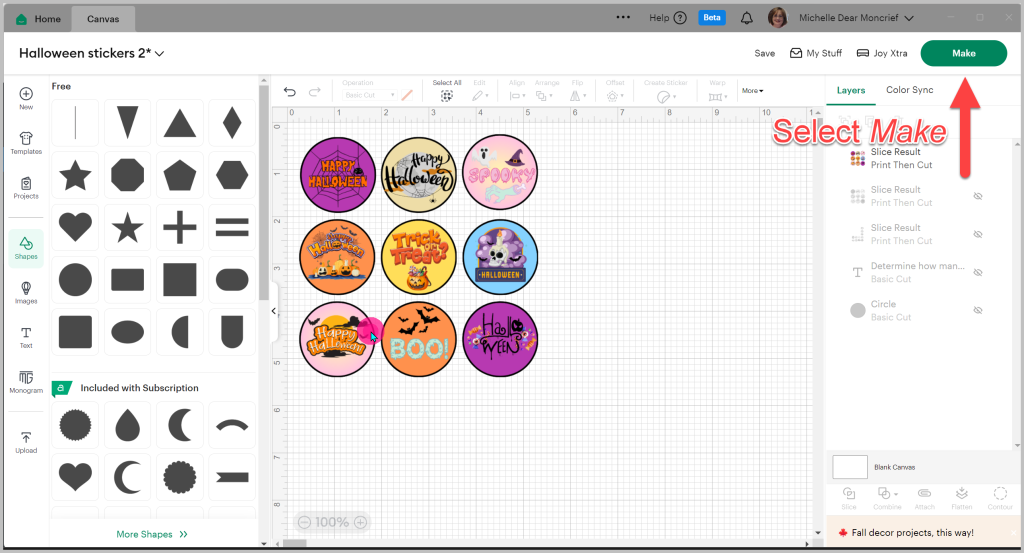
Click Make on the upper right-hand side of the screen.
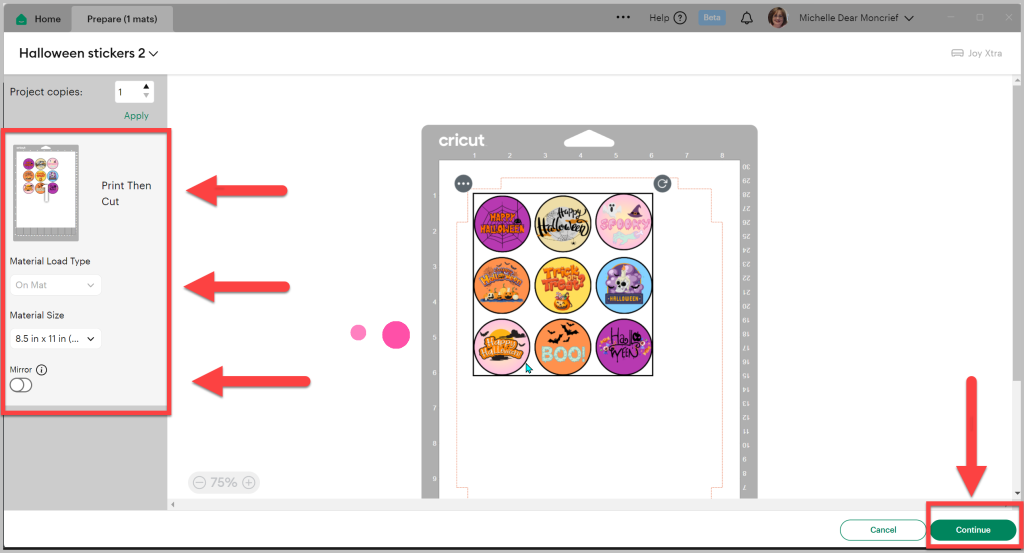
Select On Mat if you receive a dialog box. Note the registration marks on the screen. These will print around your stickers. Do not mirror the stickers.
Click Continue.
Next, we will print the stickers onto printable vinyl or sticker paper using your printer. Then, we will cut the stickers with a Cricut cutting machine.
You can also use a circle punch or scissors to manually cut the stickers once they have been printed.
Place a printable vinyl or sticker paper sheet in your printer’s automatic feed tray or rear-feed tray.
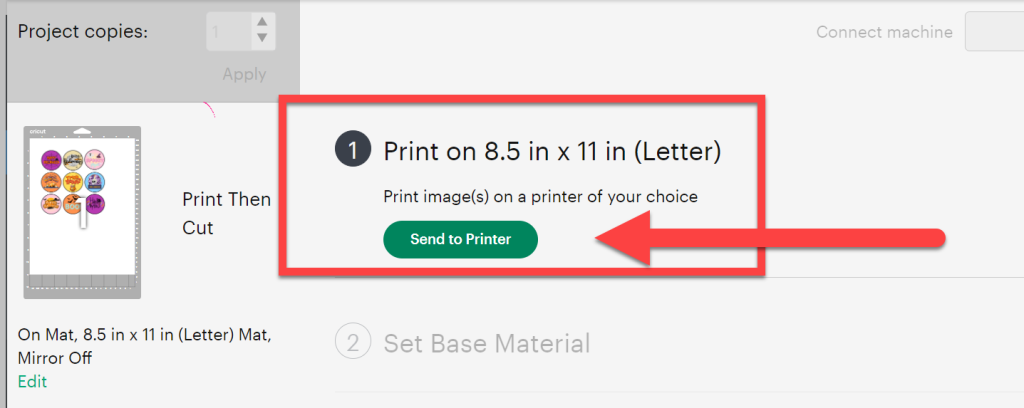
Click Send to Printer on the screen.
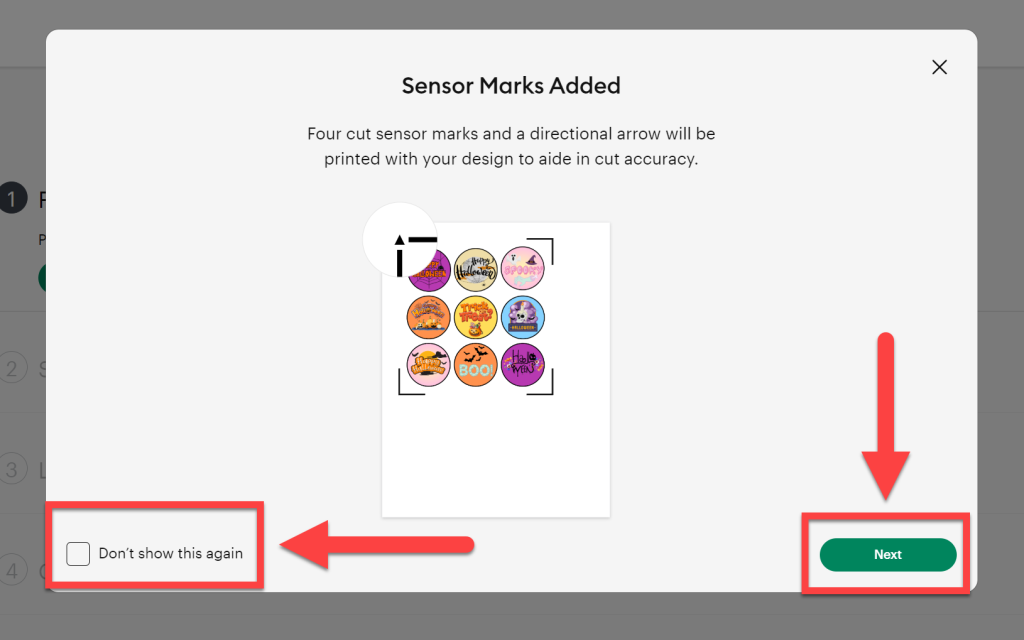
Click Next if you receive a dialog box about the registration marks.
Optionally, select Don’t show this again if you don’t want the warning to appear in the future.
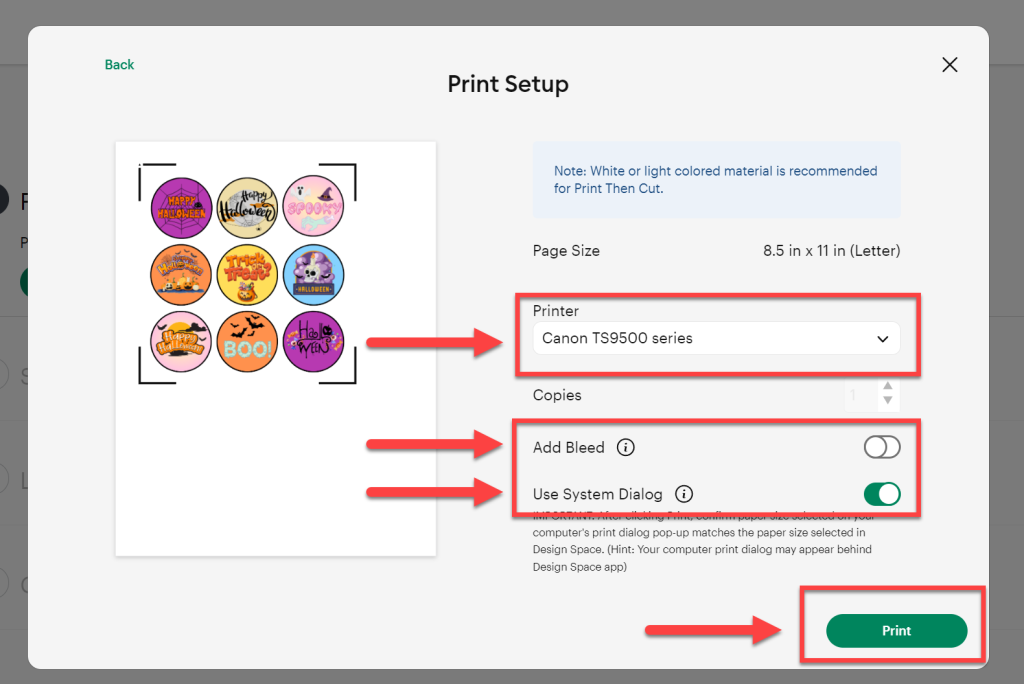
Select your printer from the dialog drop-down.
Turn the bleed OFF.
Turn the Use System Dialog toggle ON.
Select Print on the bottom right-hand side of the screen.
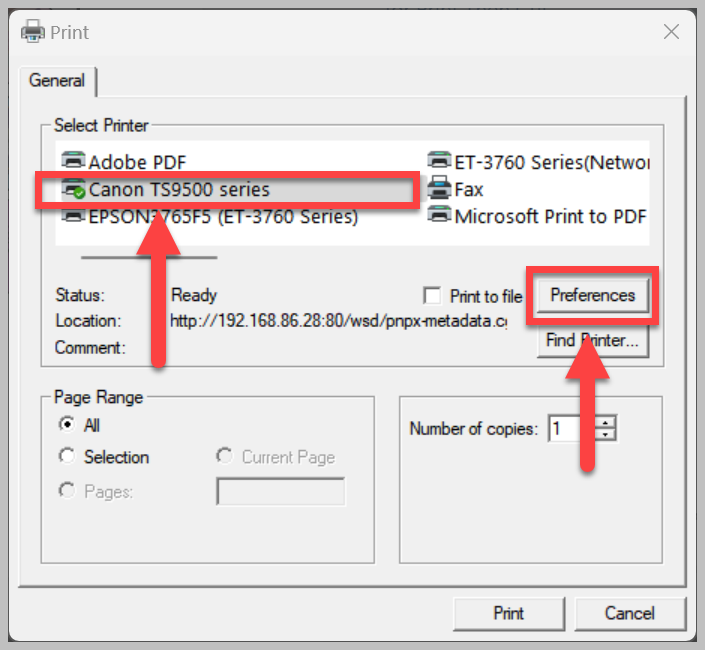
Your printer dialog box will appear differently from mine. Select your printer and go to printer settings preferences.

Select glossy photo paper.
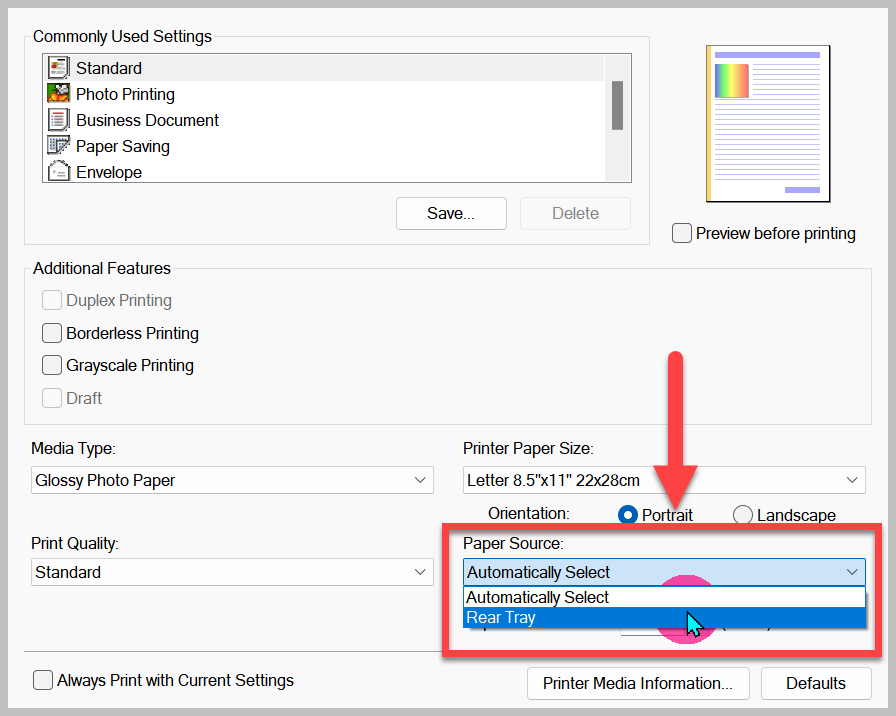
Select the tray that holds the sticker paper or printable vinyl.
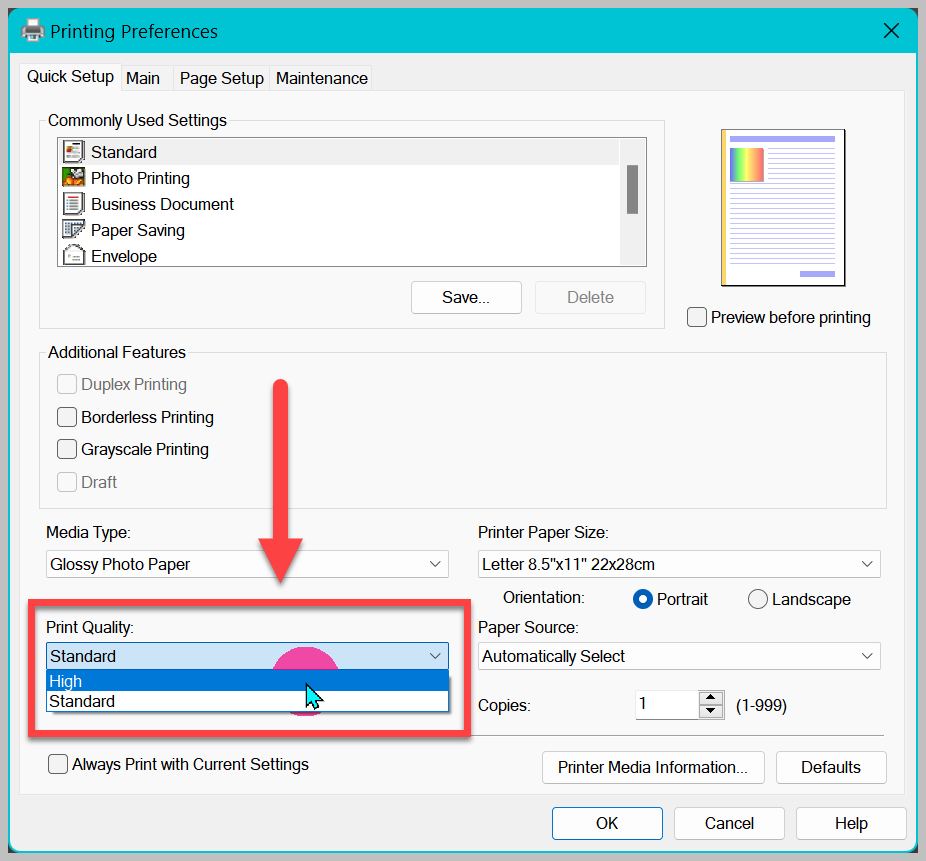
Select the highest print quality available.
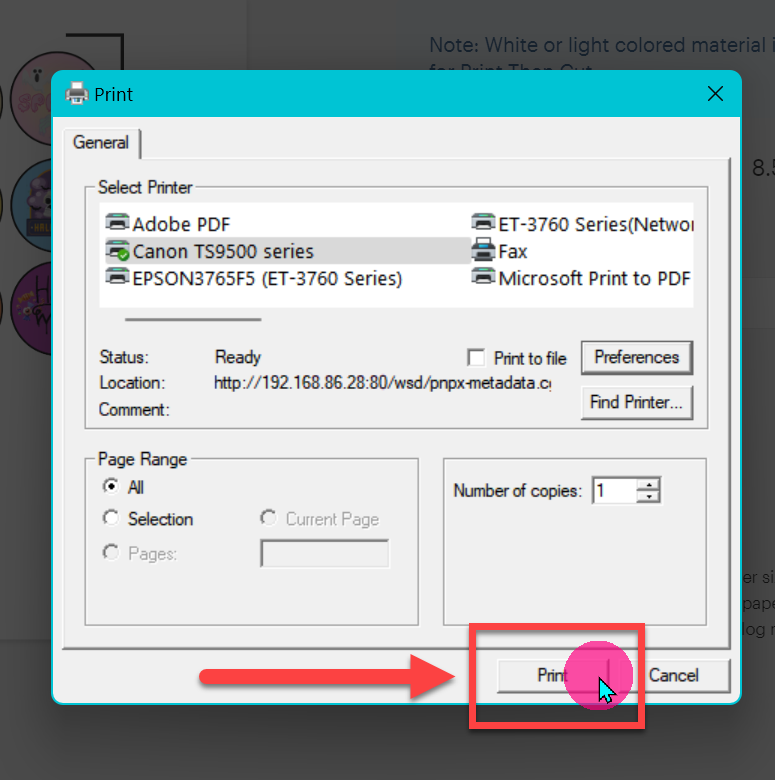
Click OK. Then, print the stickers.
Once printed, allow the ink to dry before cutting.
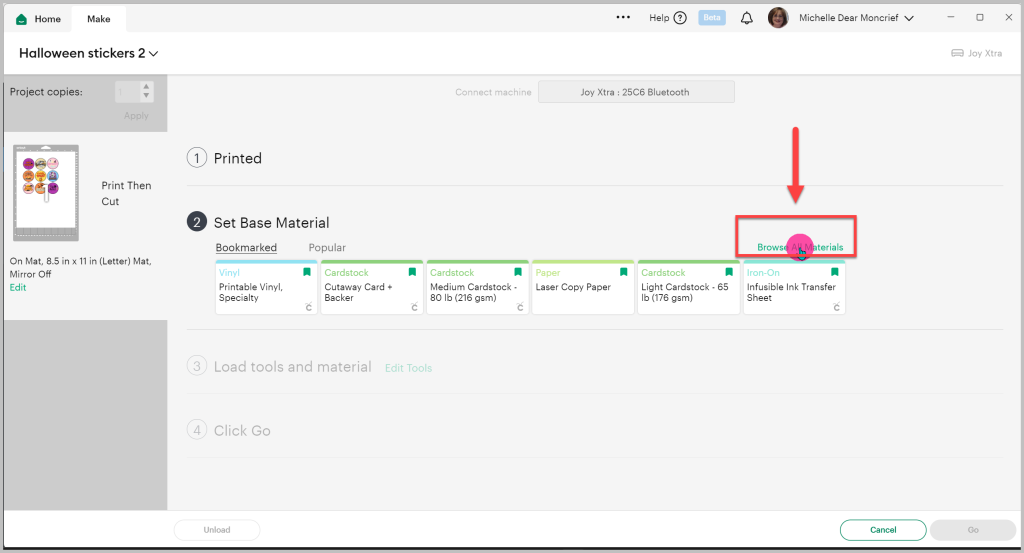
In Cricut Design Space, select the material. Click Browse all materials.
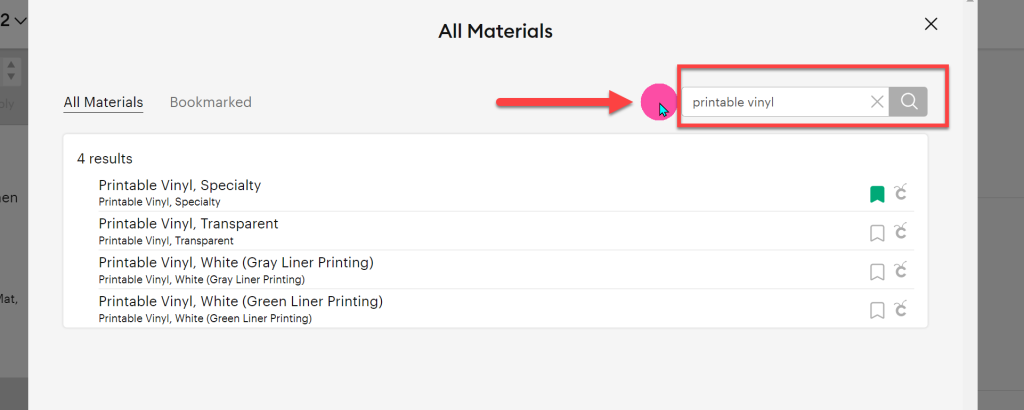
Type printable vinyl or sticker paper in the dialog box on the screen and press enter.
Select your material.
Note
If you aren’t sure which one to select, use the bottom two for Cricut-brand printable vinyl, Printable Vinyl, Transparent if you are cutting stickers printed on transparent material, or Printable vinyl, Specialty for non-Cricut brand materials.
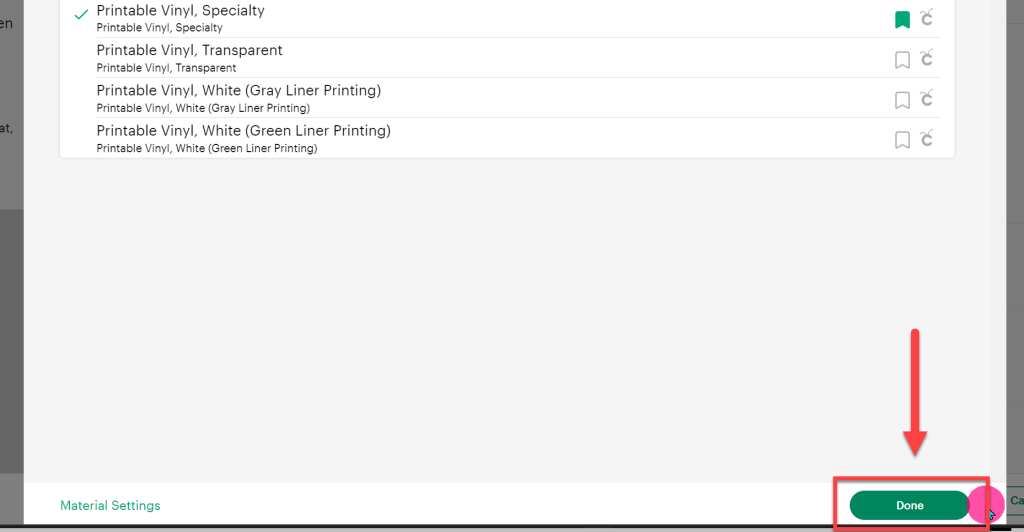
Click Done to return to the previous screen.
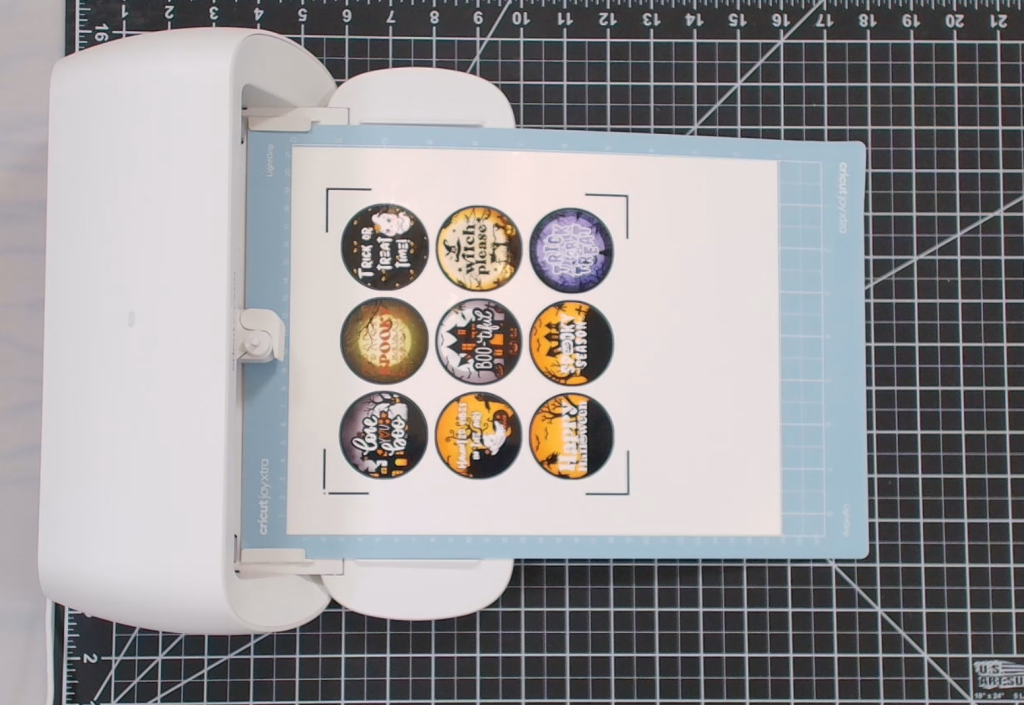
Place the printable vinyl or sticker paper onto a blue LightGrip cutting mat and feed the cutting mat into your Cricut Cutting Machine.
Press the Go button or click Go in Cricut Design Space (Joy family machines).
Cricut will read the registration marks and then cut the stickers.
If you don’t have a cutting machine or want to make them manually, you can use a circle punch or scissors to cut them out after printing.
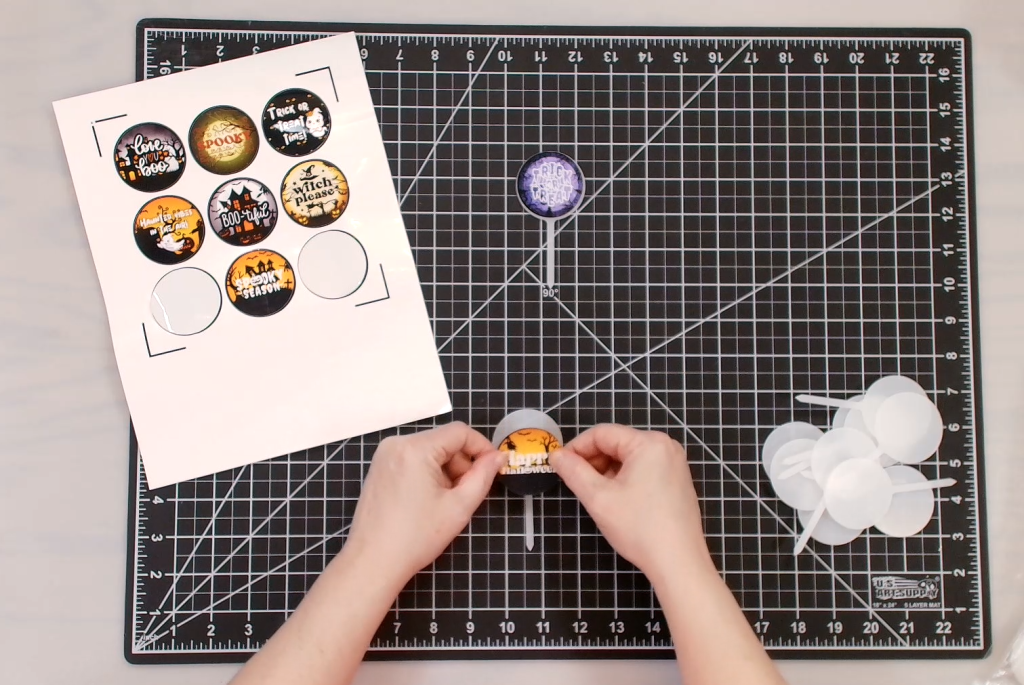
Apply the stickers to the cupcake toppers.
Tips and Tricks (or Treat)
🎃If you have never used Print Then Cut, calibrate your Cricut cutting machine for Print Then Cut. If the Cricut cutting machine is misaligned for the stickers, re-calibrate your cutting machine.
🎃Practice making stickers with Cricut Print Then Cut using regular paper. Once you have the process down, use printable vinyl or sticker paper. Learn about printable vinyl and sticker paper, and which is the best, in my post, The Best Printable Vinyl for Stickers.
🎃If your Cricut cutting machine has issues reading the registration marks, it may be because the printable vinyl is too glossy and creates too much glare. Turn the lights down or off in the area where you are cutting, as this can reduce the glare produced by high-shine printable vinyl and sticker paper.
🎃If your Cricut continues to have issues reading the registration marks for cutting, place Scotch tape over the registration marks. They will appear duller and should be easier for the Cricut sensor to recognize.
🎃Use a brayer to press the printable vinyl or sticker paper flat against the cutting mat. This will remove any air bubbles or creases on the surface of the printable vinyl.
Get Creative
These free printable Halloween stickers aren’t just for cupcakes! You can use them for so many other Halloween-themed projects.
👻Printable Halloween Stickers–perfect for labeling trick-or-treat bags or making DIY stickers.
👻Printable Halloween Labels–a great addition to Halloween party favors.
👻Printable Halloween Toppers–use these on cakes, cupcakes, or other spooky snacks.
👻Halloween Card–Create a stand-out greeting card with these adorable stickers.
👻Halloween Planner Stickers–Perfect for your Bullet Journal or other organizational systems.
👻Custom Candy Bar Wrappers–Add a little scare to your sweets!
👻Sublimation–Great for drink coasters at your Halloween shindig.
With these custom toppers, you’ll be ready to wow your Halloween guests and thrill your trick-or-treaters.
Have a suggestion? Need more information? Send me an email! Until next time, happy, happy crafting, and have a Happy Halloween!
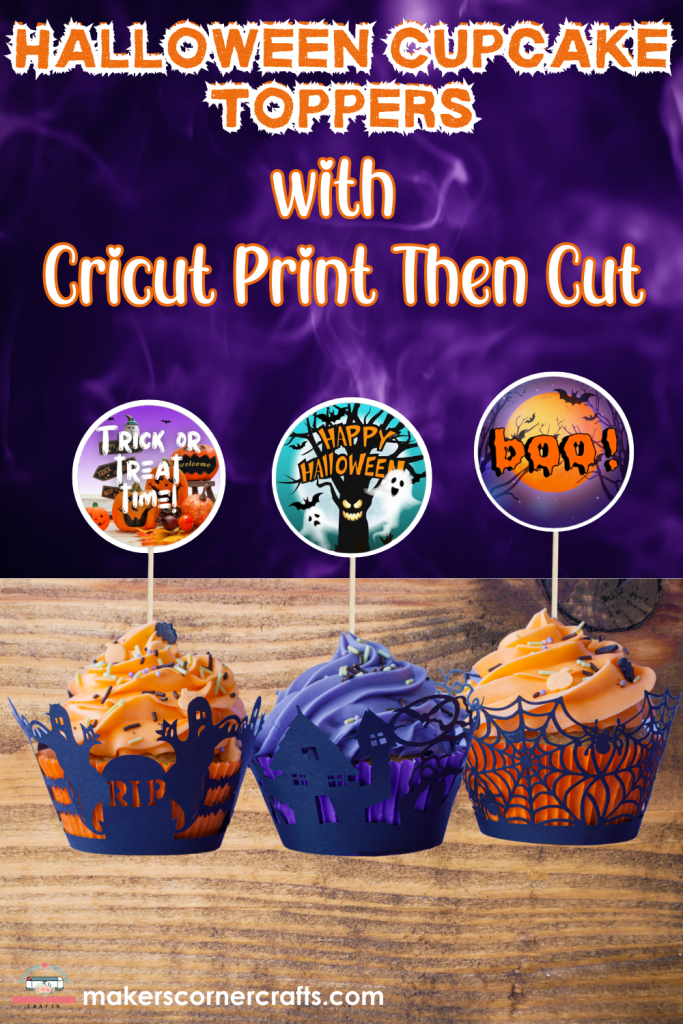
If you enjoyed this post, please pin it so others can, too!



Leave a Reply