


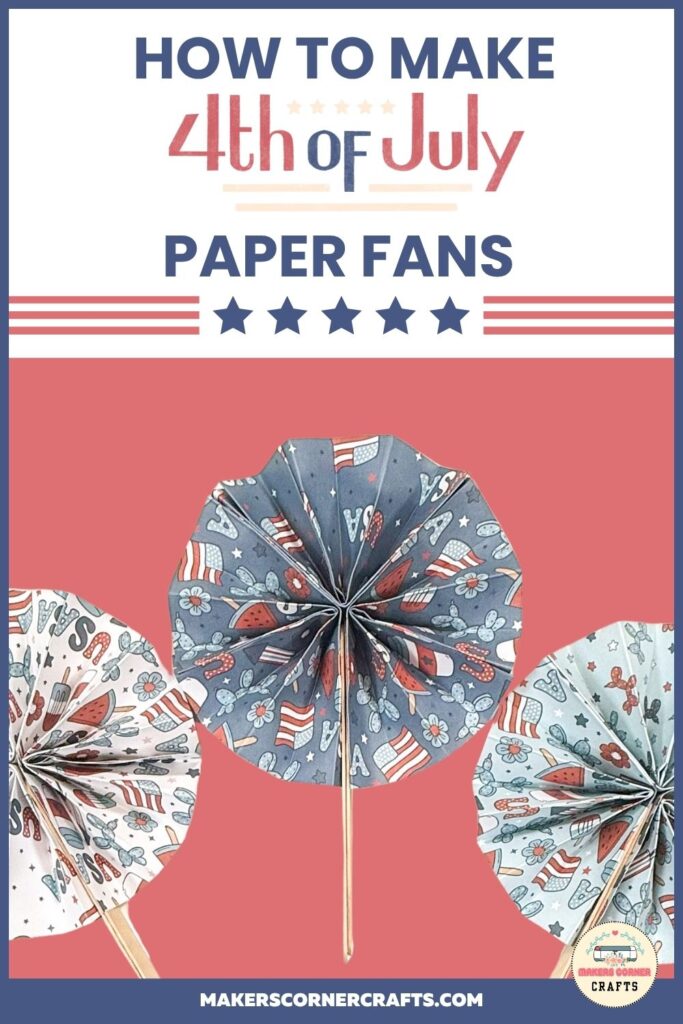
Nothing says summer celebration quite like a refreshing paper fan to keep you cool during those hot Fourth of July barbecues and outdoor gatherings. These DIY paper fans are not only practical but also add a festive touch to your patriotic decorations.
Whether you’re hosting a backyard party or attending a community fireworks display, these simple paper fan crafts will keep you cool and comfortable while showcasing your red-white-and-blue spirit.
Why Paper Fans Are Perfect for the Fourth of July
I have lived with the Texas summer heat all my life. If you’re anything like me, you keep water and fans nearby throughout the whole summer. If you’re looking to beat the heat this Fourth of July, consider making these cute paper fans, which are cost-effective, practical, and super simple to put together.
The best part about making your own paper fans is that they’re budget-friendly, and everyone can make one. Even if you’re new to paper crafting, you’ll find this project completely doable.
This post may contain affiliate links, which means I’ll receive a commission if you purchase through my links, at no extra cost to you. Please read the full disclosure for more information.
Materials You’ll Need for Your Paper Fan Craft
Creating paper fans requires just a handful of basic supplies that you might already have at home:
Essential Materials:
- FREE Fourth of July Paper Fans Kit
- Three sheets of 8.5″ x 11″ paper or three pieces of lightweight cardstock cut into 6″ x 6″ squares.
- Craft glue or adhesive. I use Bearly Arts Glue.
- Craft or popsicle sticks
- Rubber bands
- Scoring board and scoring tool (optional but helpful)
- Bone folder (optional)
- Ruler (optional)
Optional Embellishments:
- Patriotic-themed patterned paper
- Patriotic stickers or star cutouts
- Patriotic washi tape
- Red, white, and blue ribbon
For the most authentic Fourth of July look, choose printed paper or themed cardstock. Color coordinate, or use one or more of our included patriotic backgrounds. You can use washi tape to create borders on the fan.
Can’t see the video? Watch it on YouTube.
Step-by-Step Instructions for Making Paper Fans
Step 1: Prepare Your Paper
Start with your 6-inch square cardstock or letter-size paper. If you’re using a scoring board and scoring tool, this step will be much easier and create cleaner fold lines. Place a score line every 1 inch across your paper. These score lines will guide your accordion folds and ensure even pleats.
If you don’t have a scoring board, you can measure and mark 1-inch intervals with a ruler and pencil, then use a bone folder or the back of a butter knife to create light score lines.
Step 2: Create Multiple Fan Sections
Make three pieces of scored paper or cardstock, all the same size. This technique makes the fan fuller and more visually appealing. Having multiple sections also makes your paper fan more durable.
Step 3: Fold Your Paper
Fold each piece of scored paper accordion-style along the score lines. Start from one end and carefully fold back and forth, creating clean, even pleats. Take your time and create neat folds.
Step 4: Shape Your Fan Sections
Once you have all three pieces folded accordion-style, bend each piece of folded cardstock in half. This creates a curved shape that will form your fan when opened.
Step 5: Assemble Your Fan
Using adhesive, glue the inside surfaces of the folded cardstock pieces together. Apply glue carefully to avoid getting adhesive on the outside surfaces, where it may be visible.
Press the pieces together firmly and allow the glue to cure or dry completely. Remove excess glue with a microfiber cloth while it is still wet.
Step 6: Add the Handle
Glue one popsicle stick to each of the two outside lengths of your assembled cardstock fan. These craft sticks will serve as handles, making it easy to hold and operate your fan. Position them so they extend beyond the fan folds for a comfortable grip.
Let cure or dry.
Step 7: Open and Enjoy
Once the glue has dried completely, carefully unfold your fan using the popsicle stick handles. Gently spread the pleated sections to create a beautiful, functional paper fan perfect for your Fourth of July festivities.

Creative Ideas for Fourth of July Paper Fans
Transform your basic paper fans into stunning patriotic accessories with these creative additions:
Patriotic Patterns: Use patterned paper featuring stars, stripes, or fireworks designs.
Color Blocking: Alternate red, white, and blue sections for a bold striped effect.
Embellishments: Add star stickers, ribbons, or metallic accents along the edges.
Personalization: Write family names or patriotic phrases on the fan sections.
Tips for Success
To ensure your paper fan craft turns out perfectly, keep these helpful tips in mind:
- Store folded with a rubber band when not in use to maintain the accordion pleats
- Choose lightweight cardstock rather than heavy paper for easier folding
- Make sure your folds are crisp and even for the best appearance
- Allow the adhesive to dry completely before handling your finished fan
Perfect for Summer Celebrations
These DIY paper fans aren’t just limited to Fourth of July celebrations; they can be used for any occasion. They work wonderfully for summer picnics, outdoor weddings, graduation parties, or any warm-weather gathering where guests might appreciate a cool breeze.
Get Started Today
Ready to create your own festive paper fans? This beginner-friendly craft project is great for kids and adults, and will create lasting memories of your holiday celebration.
Download our FREE Fourth of July Paper Fans kit, which includes instructions and four printable patriotic backgrounds to print onto paper. Watch the video for complete instructions.
It’s easy to create professional-looking paper fans that will impress your guests and keep everyone comfortable during those hot summer celebrations.
These paper fans pair perfectly with other Fourth of July crafts, such as patriotic pinwheels, and complement our Fourth of July activity pack, available in our shop. Start crafting today and add a personal touch to your Independence Day festivities!
If you enjoyed this post, please pin it so others can too!



Leave a Reply